
Sending a screenshot through email is one of the fastest ways to share information visually. Whether you’re reporting a bug, sharing a design, or explaining a technical issue, attaching a screenshot makes communication clear and efficient. This 2025 guide will walk you through exactly how to take and attach screenshots to your emails on desktop, laptop, and mobile devices.
Why Attach a Screenshot to an Email?
Clearer Communication
Screenshots eliminate confusion by showing exactly what you’re seeing on your screen.
Saves Time
Instead of long explanations, a screenshot gives instant context to the reader.
Useful for Troubleshooting
When seeking tech support, a screenshot of the problem speeds up the resolution process.
Knowing when and how to attach screenshots makes your emails more effective and professional.
How to Take a Screenshot
On Windows 11/10
- Press PrtScn to capture the entire screen.
- Press Windows + Shift + S to open Snip & Sketch and capture a portion of the screen.
- Use the Snipping Tool for customized screenshots.
After taking the screenshot, it gets copied to the clipboard or saved in the Pictures > Screenshots folder.
On Mac (macOS Ventura or Later)
- Press Command + Shift + 3 to capture the entire screen.
- Press Command + Shift + 4 to select and capture a specific area.
- Use the Screenshot app (found in Utilities) for timed screenshots.
Screenshots are automatically saved to your desktop unless specified otherwise.
On Android Phones
- Press Power + Volume Down buttons together to capture the screen.
- Screenshots are saved in the Screenshots album inside your Photos or Gallery app.
On iPhone (iOS 16 and Later)
- Press Side Button + Volume Up together.
- Find your screenshots in the Screenshots folder under Photos.
Taking a screenshot is the first step before you can attach it to an email.
How to Attach a Screenshot to an Email on Desktop
Compose a New Email
Open your email client (Gmail, Outlook, Yahoo Mail, Apple Mail, etc.) and click Compose to start a new message.
Insert Attachment
Look for the Attachment icon, usually represented by a paperclip.
Click it to open your file explorer.
Locate Your Screenshot
Navigate to the folder where your screenshot was saved (like Desktop, Pictures, or Screenshots folder).
Select the screenshot file.
Attach and Send
The file will appear attached to your email.
Type your message and hit Send when ready.
This method is the same for most desktop email services.
How to Attach a Screenshot to an Email on Mobile Devices
Open Your Email App
Use Gmail, Outlook, Apple Mail, Yahoo, or your preferred mobile email app.
Tap Compose to start a new email.
Tap the Attachment Icon
Find and tap the paperclip or “+” icon in the compose window.
Choose Attach file or Insert photo depending on the app.
Choose the Screenshot
Navigate to the Screenshots album in your phone’s photo gallery.
Select the screenshot you want to attach.
Send the Email
Once the screenshot uploads, add your message and hit Send.
Sending screenshots through mobile is very similar across both Android and iPhone.
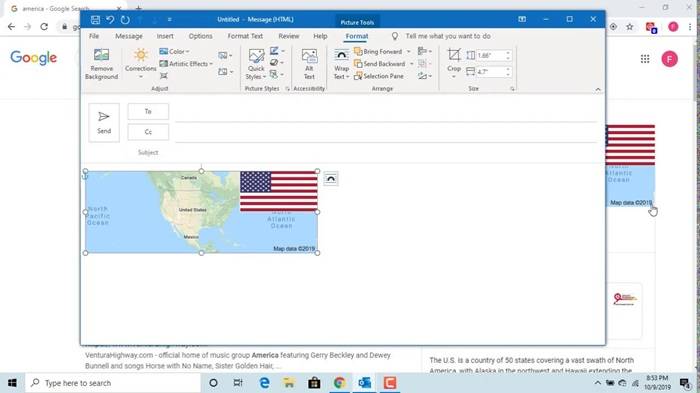
How to Paste a Screenshot Directly into an Email
For Gmail on Desktop
After taking a screenshot (saved to clipboard), you can simply:
- Open a new email.
- Click into the email body.
- Press Ctrl + V (Windows) or Command + V (Mac) to paste.
The screenshot will be embedded directly into the email body without needing to attach it as a file.
For Outlook Desktop App
Similarly, paste the screenshot into the body of the message using Ctrl + V or right-click > Paste.
Embedding is useful when you want readers to view the screenshot immediately without downloading attachments.
Common Problems and Solutions When Attaching Screenshots
Screenshot File Is Too Large
Solution: Resize or compress the image before attaching. Use built-in editors or online tools to reduce file size.
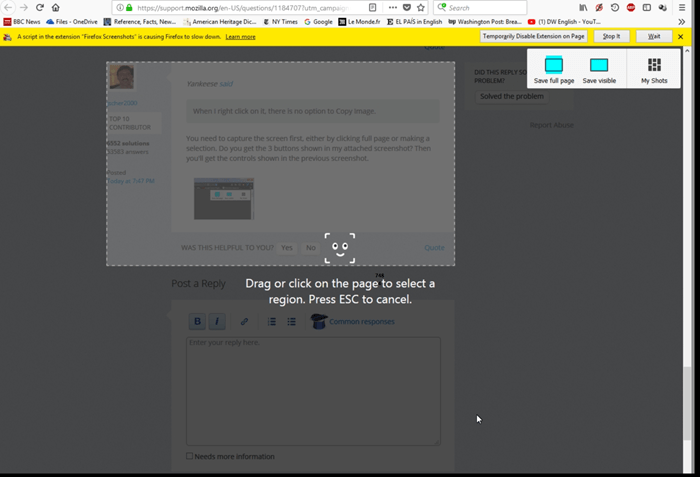
Can’t Find Screenshot Location
Solution: Check your default save location settings in your device or use the search function to find recent screenshots.
Error Uploading Screenshot
Solution: Ensure stable internet connection. Restart the email app or refresh the browser if needed.
Screenshot Quality Is Poor
Solution: Retake the screenshot using a higher-resolution screen area. Avoid taking screenshots of blurry or zoomed-out windows.
Tips for Attaching Screenshots Effectively
Label Your Screenshots
Rename files with descriptive titles like “LoginError_Screenshot.png” for easier identification.
Use Annotation Tools
Mark important areas with arrows, circles, or notes before sending to provide more clarity.
Keep Screenshots Secure
Avoid including sensitive information like passwords, personal addresses, or account numbers in screenshots unless necessary and secure.
Double-Check Attachments
Always preview your attached screenshot before hitting Send to ensure the right file is shared.
By following these tips, your screenshots will always serve their intended purpose clearly and securely.
Frequently Asked Questions (FAQs)
Can I attach multiple screenshots to one email?
Yes, you can attach multiple screenshots at once by selecting multiple files during the attachment process.
How do I reduce the size of a screenshot before attaching?
Use image editing tools to resize or compress the screenshot before attaching it to your email.
Can I paste a screenshot directly instead of attaching it?
Yes, on most email clients like Gmail and Outlook, you can paste a screenshot directly into the email body.
Why can’t I find the screenshot I just took?
Check your default screenshot save location. On Windows, it’s usually under Pictures > Screenshots; on Mac, it’s on the Desktop.
What file format are screenshots usually saved in?
Most screenshots are saved as PNG files by default, but some devices allow you to change them to JPEG or other formats.
Attaching a screenshot to an email is a simple yet powerful way to enhance your communication. Whether you’re using a desktop, laptop, Android, or iPhone, following these step-by-step instructions ensures that your screenshots are shared efficiently and clearly every time.