There is always a message stored in every mailbox that can never be removed. A day’s message, reminder or project report. However, as more and more emails keep on coming, it gets drowned amidst hundreds of other emails. That is when Gmail’s email pinning feature comes to the rescue.
When you pin an e-mail, it’s just sitting right at the top of your inbox waiting and ready for you to open it whenever you’re ready to open it. It isn’t buried in the scroll. It’s there, accessible at all times. Gmail is not necessarily “pinning” an e-mail, but its star system and priority mark accomplishes the same thing.
Here in this tutorial, we will show all the methods — starring, marking key, filtering, and tabs — to pin your key emails and reach them in one click. Desktop or mobile, we will show you how to turn Gmail into a nice and neatly arranged system where nothing gets lost.
What Does Pinning an Email Mean in Gmail
Pin in Gmail is just marking an email so that it is always in your face or easily accessible. You can’t just cram it up there like a post-it note, but you can star or flag an email as significant so Gmail will make it stand out and easily accessible.
Alternative to the old-fashioned pinning:
- Star emails to make them stand out and mark them as significant.
- Mark with the “Mark as Important” marker (yellow arrow) so Gmail will give them top priority.
- Create labels or filters that will gather all your priority emails into one place.
By combining the two, you can actually “pin” any email and have it stay in your inbox — like it’s on a social board or on a to-do list.
Why You Should Pin Emails in Gmail
If you’re getting hundreds of emails a week it’s simple to feel swamped. Pinning keeps your virtual life tidy and organized.
Here’s why it works:
- Reminds you of significant messages.
- Saves time searching for them.
- Protects you from unintentionally deleting or archiving.
- Collects projects or deadlines in one place.
- Reduces inbox anxiety.
In simple words, pinning Gmail emails makes your inbox work for you, not confuse you.
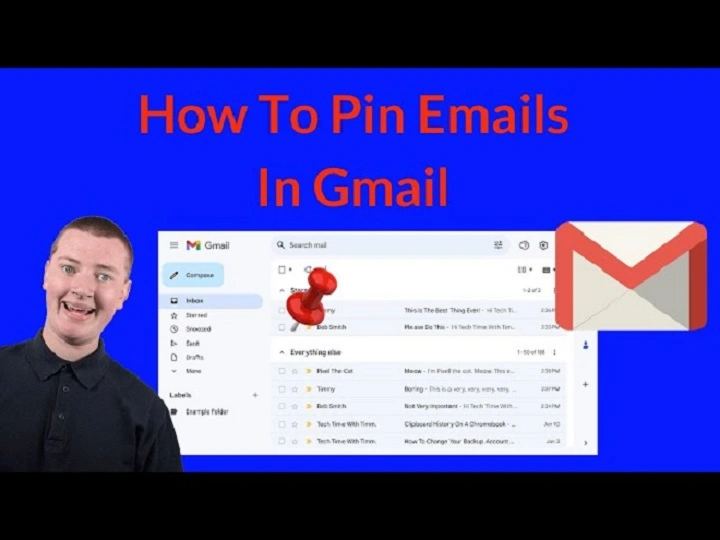
How to Pin Emails in Gmail on Computer (Using Stars)
The easiest method of pinning an email in Gmail is by starring it. As soon as you star an email, it gets marked prominently.
Step-by-Step:
- Launch Gmail on your computer.
- Tap on your Inbox.
- Find the message which you want to pin.
- At the left end of the email, tap the Star icon (★).
- The star turns yellow, and you will know that it’s pinned.
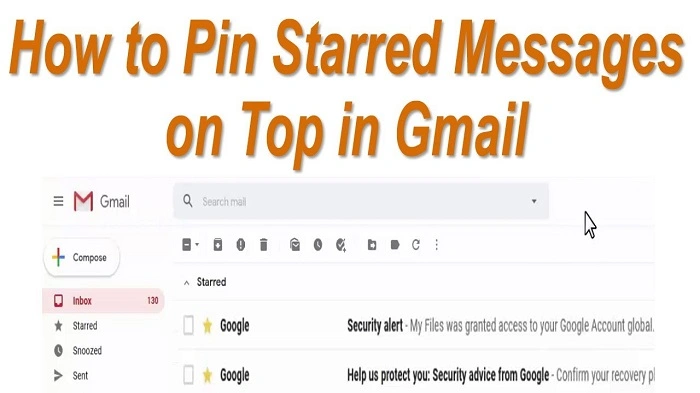
To View Pinned Messages:
- Click Starred in the left menu.
- You’ll have all of your pinned (starred) messages in one list.
This section acts like a “Pinned” folder and constantly shows what’s most important to you.
How to Pin Multiple Messages at a Time
If you want to star multiple important emails at once:
- Go to your Inbox.
- Check the boxes next to each message you want to pin.
- Click on the Star icon at top.
All your selected emails are pinned instantly.
How to Pin Emails in Gmail Using Importance Markers
Another way of pinning messages to the top is flagging them as important. Gmail will always bump higher-priority mail to the top if you change to the Priority Inbox view.
Steps:
- Open Gmail.
- Put the cursor over the message to flag.
- Click on the yellow arrow (▶) next to it.
- The message now includes a small yellow flag that tells Gmail that this is an important message.
To View Only Important Messages:
- Tap Important in the side menu.
- All the messages you’ve marked as important appear here.
Gmail becomes smarter about you, too — the more you mark or unmark messages as important, the smarter it becomes.
How to Use Priority Inbox to Pin Emails Automatically
To keep important emails at the top of Gmail forever, enable Priority Inbox layout.
Steps:
- Click the ⚙️ icon (top-right in Gmail).
- Click See all settings.
- Click Inbox.
- In the “Inbox type” section, select Priority Inbox.
- Select which Gmail sections you want to display:
- Unread and important
- Starred
- Everything else
- Save changes.
Sample layout:
- Top: Important and Unread (like pinned emails)
- Middle: Starred messages (manually pinned)
- Bottom: Everything else
This configuration keeps significant messages on the screen even after others show up.
How to Pin Emails in Gmail App on Mobile
There is no “pin” button in the mobile Gmail app, but the Star accomplishes the same thing.
- Open Gmail app.
- Locate the email you want to pin.
- Tap on the Star icon next to the sender’s name.
- It turns yellow, which means it’s pinned.
- Click on the three horizontal lines (☰) on top left.
- Select Starred.
- All your starred messages will be grouped together for you.
It is actually on all devices — whatever you star on your phone will be starred on your computer too.
How to Pin Emails at the Top of Your Inbox
If you prefer Gmail to actually keep starred or priority emails at the top, instead of just tagged, you can utilize filters or categories.
Option 1: Show Starred Emails First
- Tap the gear icon (⚙️) → See all settings.
- Go to Inbox.
- Under “Inbox type”, select Starred first.
- Save.
All starred emails are now shown first at the top, and then the rest.
Option 2: Show Important Emails First
- Go to Settings → Inbox.
- Mark Important first.
- Save changes.
This will pin all important mails on top automatically.
How to Automatically Set Up Filters to Pin Emails
You can pin or mark individual mails automatically in Gmail.
Steps:
- Open Gmail.
- Click search bar arrow (▼) at top.
- Add filter conditions — e.g.,
- From: [email protected]
- Subject: project update
- Click Create filter.
- Star it or Mark it as important.
- Click on Create filter again.
Now all the mails that satisfy that rule will be automatically pinned.
How to Pin Emails in Gmail with Labels
Labels are indeed folders where pinned messages are put inside them.
Steps:
- Open Gmail.
- Select a distinguished mail.
- Click the Label icon in the top.
- Choose an existing label or create a new one (e.g., “Pinned”).
- Click Apply.
To view them later:
- Look at the left sidebar.
- Click the label name (“Pinned”).
All your priority mails are there in one place — like a pinned inbox.
How to Pin Emails on Gmail Home Screen (Android Shortcut)
If you have an Android phone, you can do better.
Steps:
- Open the Gmail app.
- Locate a starred or highlighted email conversation.
- Tap ⋮ (three dots) → Add to Home screen.
That’s it. Your pinned email is now resting on your phone home screen ready for easy recovery.
How to Pin Emails in Gmail Using Tasks
It’s also possible to “pin” an email by saving it to your Google Tasks list.
Steps:
- Open Gmail.
- Select the email you want to pin.
- Click the Add to Tasks icon from the toolbar.
The email is pinned as a task in the side panel.
This makes your most important email stuck to your to-do list — a simple way to keep things organized.
How to Unpin Emails in Gmail
Once you no longer need an email, you can unpin it.
To Unstar:
- Click the yellow Star icon again.
- It becomes gray.
To Remove Importance Marker:
- Click the yellow arrow (▶) again.
- It is disabled.
The email drops out of the pinned list or “Starred” mailbox.
How to Pin Emails Forever
To have an email stick around regardless:
- Star it.
- Mark it as important.
- Label it with a “Pinned” label.
- Archive the rest.
Now, even when you’ve emptied your inbox, that message is safe and backed up in a few places.
How to Pin Emails in Gmail Using Browser Extensions
If you need a real “Pin to top” feature, some Chrome extensions deliver.
Some of the better known among them are:
- Gmelius: You are able to pin a message at the top of your inbox.
- DragApp: It turns Gmail into a task board with pinned cards.
- Sortd for Gmail: Visually ordered and pinnable emails.
Once you’ve installed it, there will be a “Pin” button on either side of messages. Click, and the email is pinned at the top.
How to Keep Pinned Emails Organized for Better Productivity
Now that you’ve got your highest priority emails pinned, keeping them at your fingertips really does make a difference.
Here’s how to be a Pro:
- Use different colored stars for different priorities.
- Have one “Pinned” label for work and one for personal.
- Check over your pinned emails weekly and unpin the old ones.
- Pin and save emails to keep your inbox organized.
- Sync pinned emails with tasks to build a daily priority list.
Little steps keep your inbox organized and efficient.
How to Pin Emails in Shared Gmail Accounts
If you’re a team or shared mail member in Google Workspace, you can “pin” priority emails too:
- Apply labels like “Important” or “Action Required.”
- Apply shared filters that automatically star some emails.
- Make sure everyone has Starred first enabled in their inbox view.
This puts everyone on the same page without omitting vital information.
Also Read: How to Find Archived Gmail: Calm, Easy Steps That Really Work
Pinning Emails in Gmail Benefits
Pinning is simple but totally transforms your inbox:
- You don’t miss a thing.
- You open Gmail and immediately know what matters.
- You spend less time searching.
- Your inbox becomes your checklist.
You don’t need to be a power user. You just have to learn how to use Gmail’s own features in creative ways.
Pin Blunders
- Not Saving Changes – While altering inbox appearances, always remember to click “Save Changes” afterwards.
- Pinned Emails Being Archived Accidentally – Pinned and saved are distinct — double check before clearing your inbox entirely.
- Relying On Only One Method – Use stars, labels, and importance markers together for maximum flexibility.
- Not Gmail Syncing – If pins don’t display on smartphones, sync your Gmail app.
- Not Minimizing Recurrently Pinned Emails – Having dozens of saved emails is counterproductive; trim down to essentials.
Real-Life Applications of Pinning in Gmail
- Freelancer: Pinned client invoices and project emails for quick access.
- Student: Pinned assignment submissions or reminders for school.
- Team Leader: Pinned weekly goals or meeting reminders.
- Family Member: Pinned travel confirmations or family news.
It is good for anyone, not just professionals.
Quick Recap
That is how to pin emails in Gmail effectively:
- Star emails: Fast, simple, and intuitive.
- Mark important: Flags them at the top of Priority Inbox.
- Use labels: Creates folders for pinned ones.
- Switch inbox type: Choose “Starred first” or “Important first.”
- Add to Tasks: Shifts emails to reminders.
These collectively offer you a great “pin” system for 2025.
FAQs on Pinning Emails in Gmail
Can one pin top-of-Gmail emails?
Yes. Choose the inbox view to “Starred first” or “Important first” and shift the emails to the top.
How do I pin an email?
Press the Star icon or the Important flag (yellow arrow).
Can emails be pinned on a mobile phone?
Yes. Tap the Star beside the email. It automatically syncs with your computer.
I can pin emails forever, right?
Yes. Star and mark them important. They will remain pinned even if you’ve deleted your inbox.
How do I unpin an email?
Tap the Star or Important flag again to revert.
Pinning messages in Gmail simplifies life. You will never miss an important message. It’s a deadline, a client response, or a reminder—you can find them in your pinned messages.
With starring, labeling, and the Priority Inbox layout, you turn Gmail into your own command center — simple, smart, and powerful.
Pin today’s most crucial email. From the next time you open your inbox, you will notice the difference — peaceful, focused, and prepared.